Work over the past couple of days…

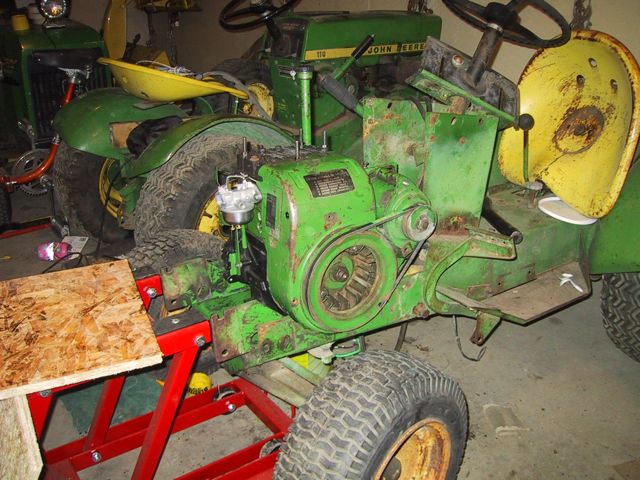
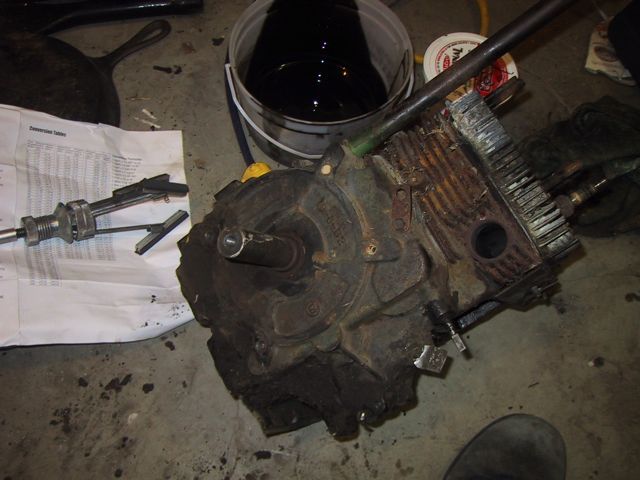
So, I pressed on after the unfortunate flywheel incident…

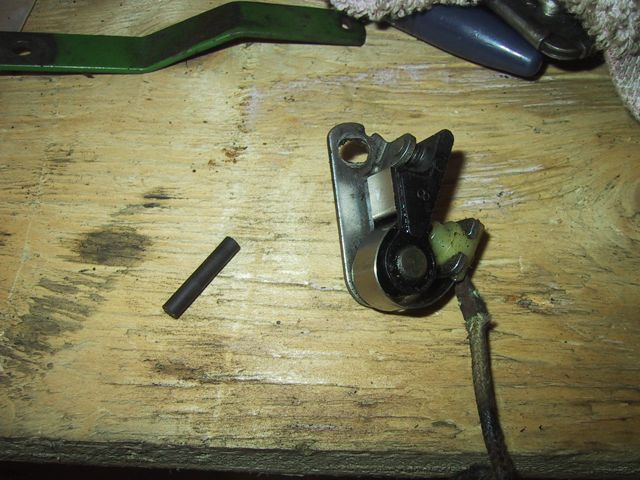
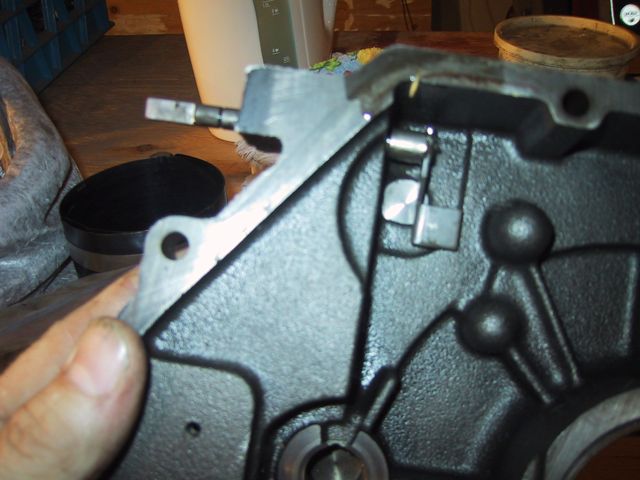
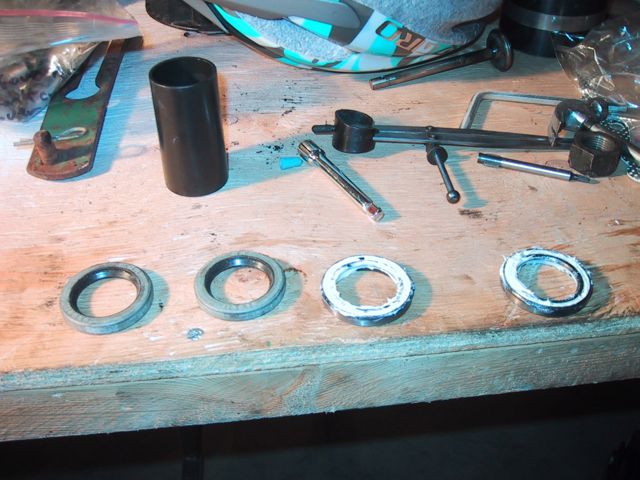
Figured before I got much more strapped onto the engine, I’d better reinstall the points…. Here’s the old ones, and the fibre rod, which I can’t get a new one of, apparently

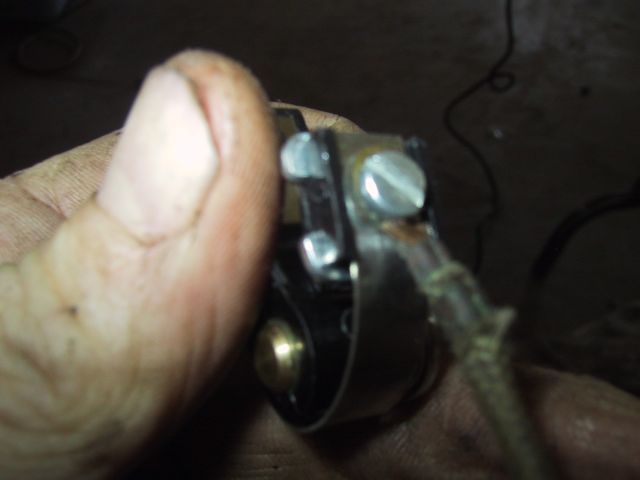
And the shiny NEW points (actually the Kohler set, but you can’t tell!)

I strapped the OLD lead back on, which is probably a mistake, but I couldn’t get a replacement from Deere… However, I’m open to suggestions about what kind of weather-proof, durable wire I could use to replace the old fabric and rubber insulated wire…

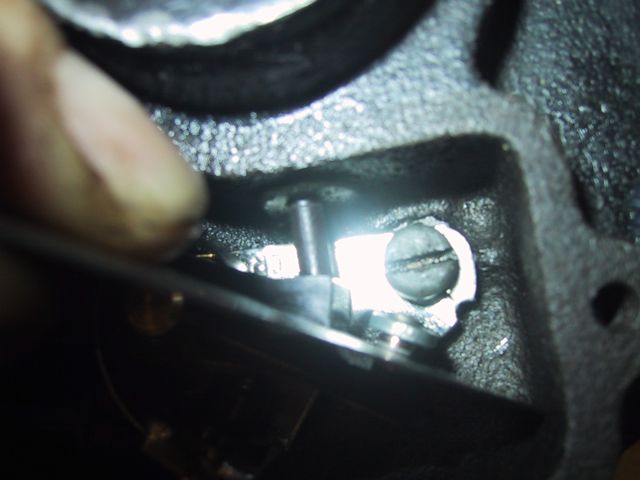
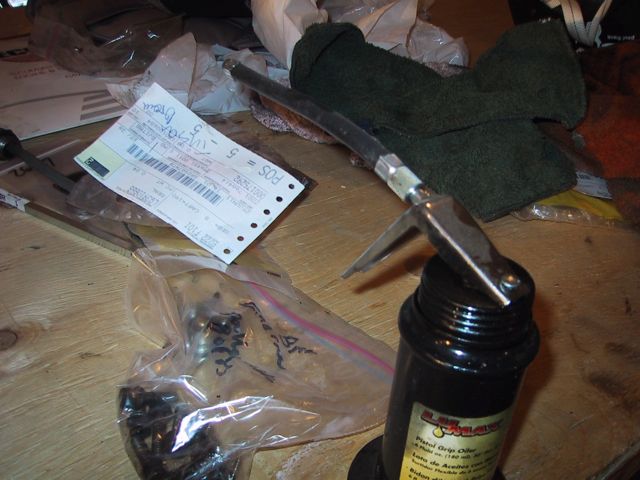
Figured I’d better do the gapping while I’ve got the engine out and easily accessible… 0.020, just like the manual says!

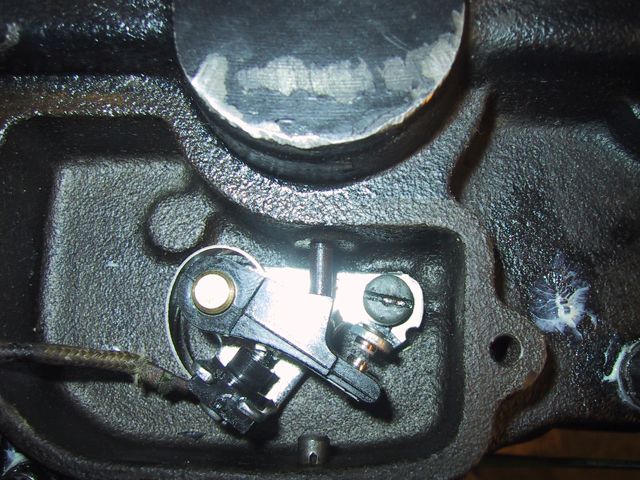
All set to get the ignition system hooked up!

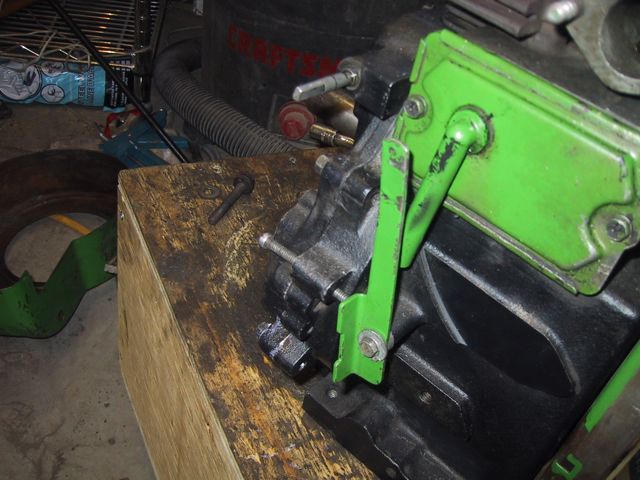
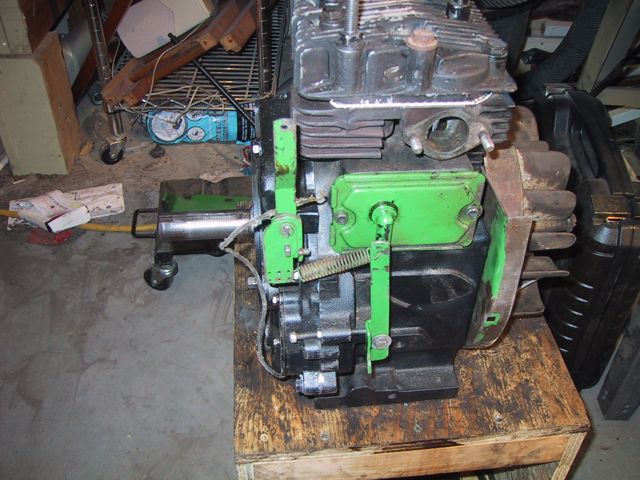
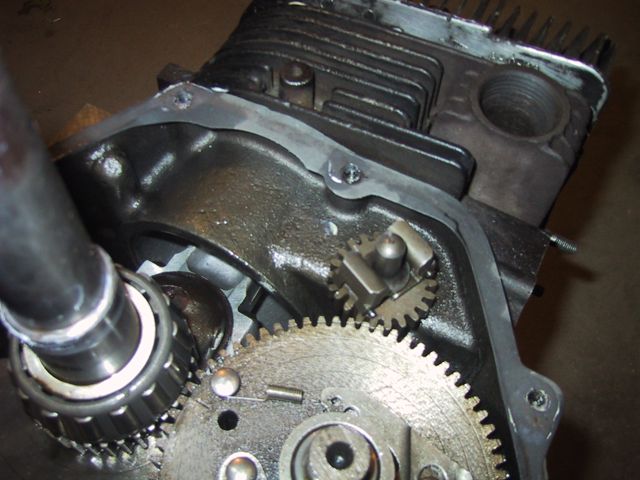
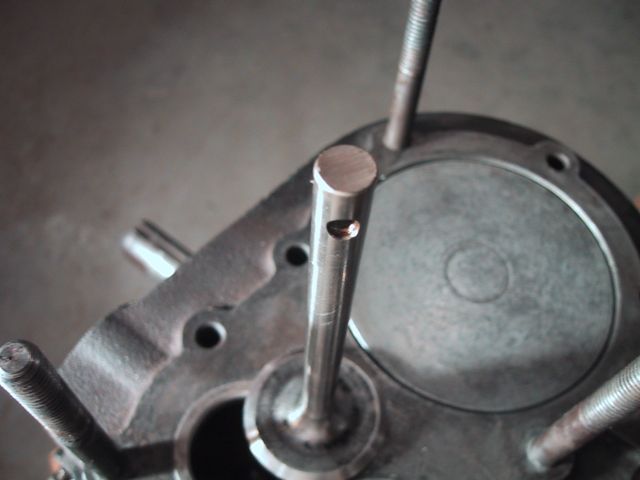
Got the lower governor rod cleaned up and installed,

and the rest of it…

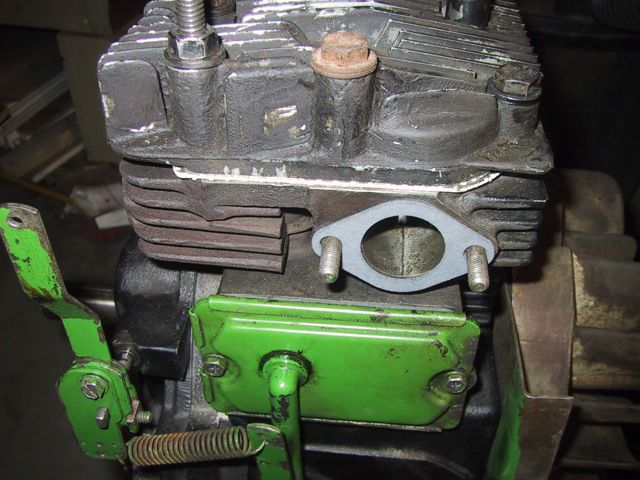
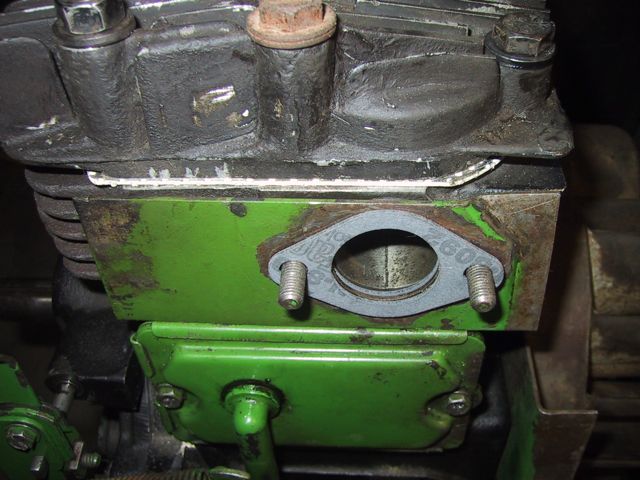
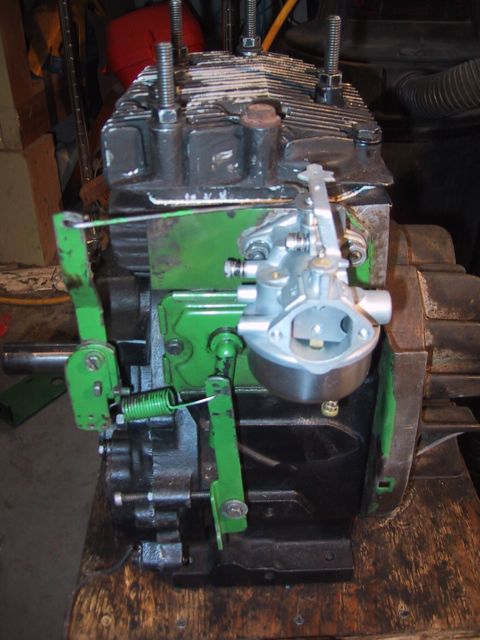
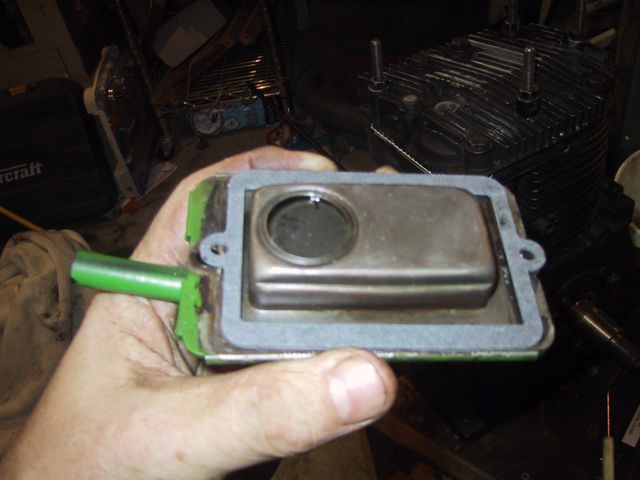
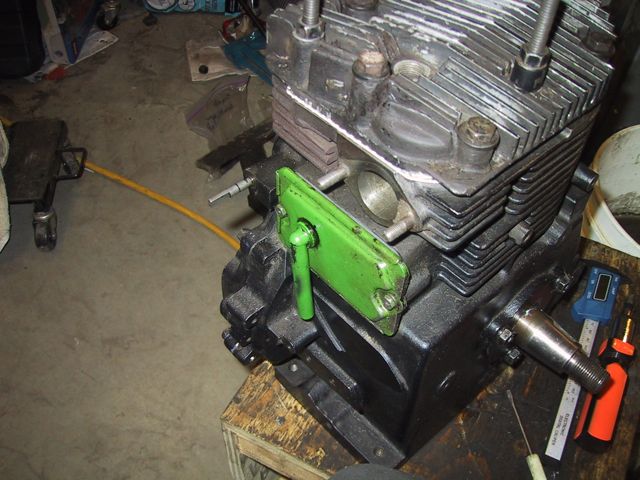
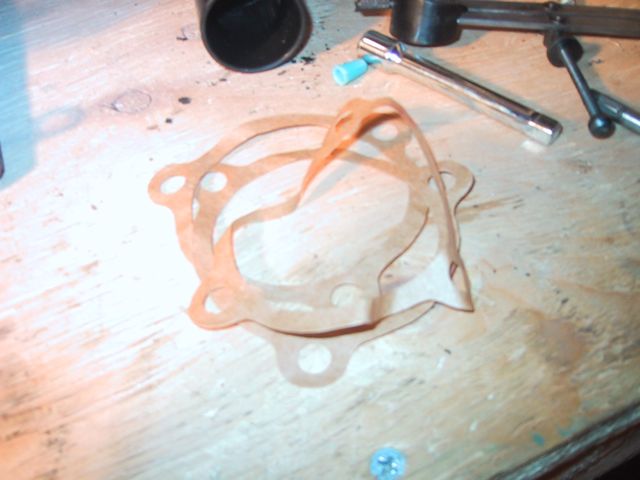
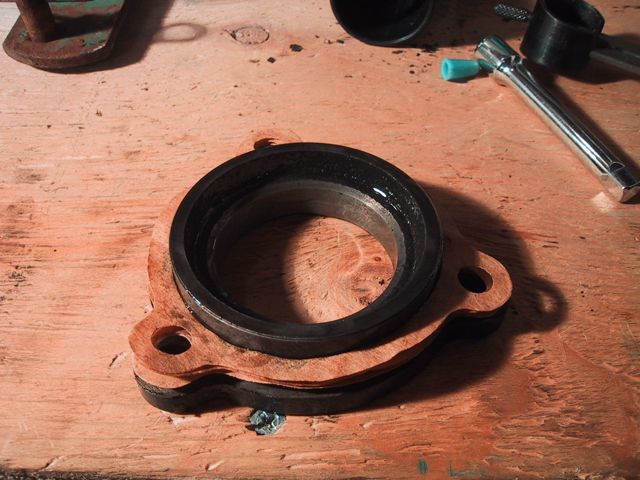
The FIRST carb gasket back in…

The heat shield (far cleaner than before!) and the second carb gasket
(here’s before)

(and after)

The super-clean carb back in… (didya notice, I found the RIGHT governor spring? )

And then I strapped the HEAVY generator back on…

I haven’t found a starter-generator pulley yet, so I was forced to put the OLD cruddy broken out one back on so that I could drop the tin on and get the belt on…

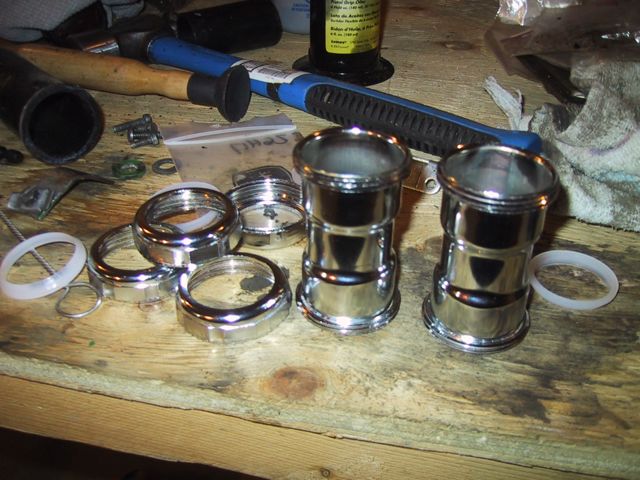
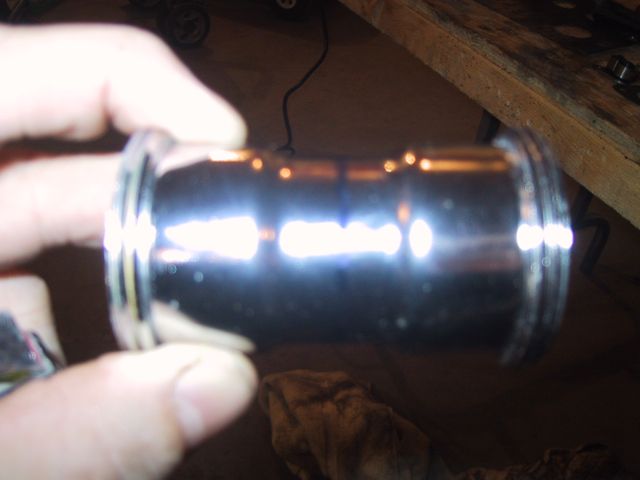
That was all Sunday and Monday/Thanksgiving Day…

Segue to Tuesday night/Wednesday morning, Kidlet #1 wants to get more work done on her Halloween costume, so I went out with the plumbing to use the rotary tool and the bench grinder…

Here’s the plumbing she and her friend wanted…

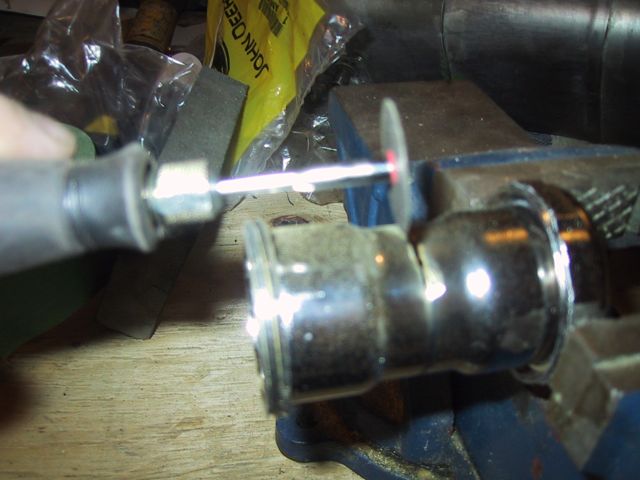
Marking the half-way point on one of them,

Cutting it apart! DANG ya sure go through a lot of those teeny cut-off wheels, eh? Thank goodness for safety goggles

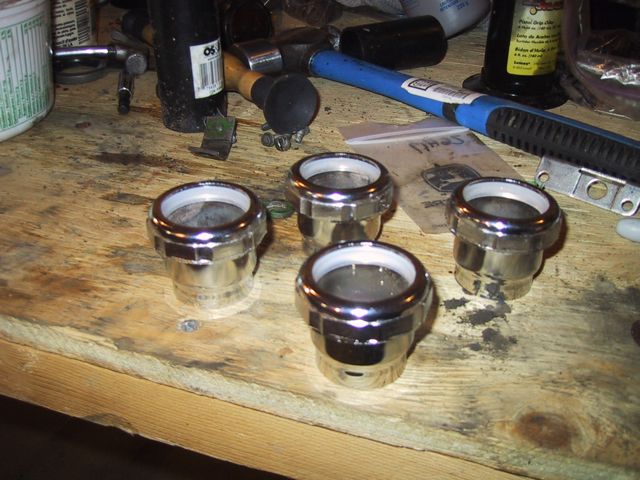
After I’d cut them, bench-ground them smooth with the new bench grinder (yay!) then sanded the rougher bits with the rotary tool… here they are…

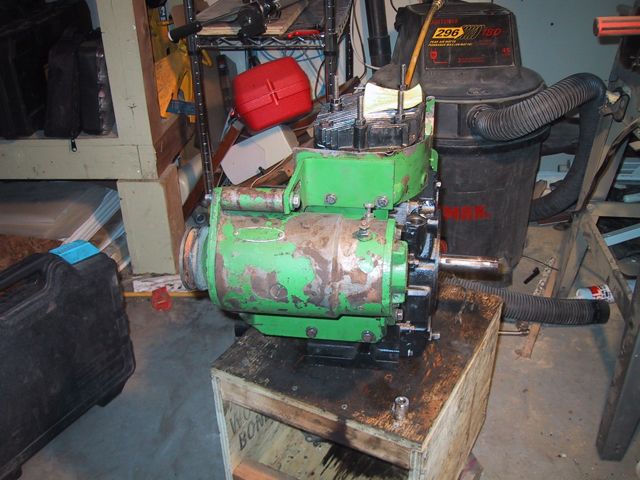
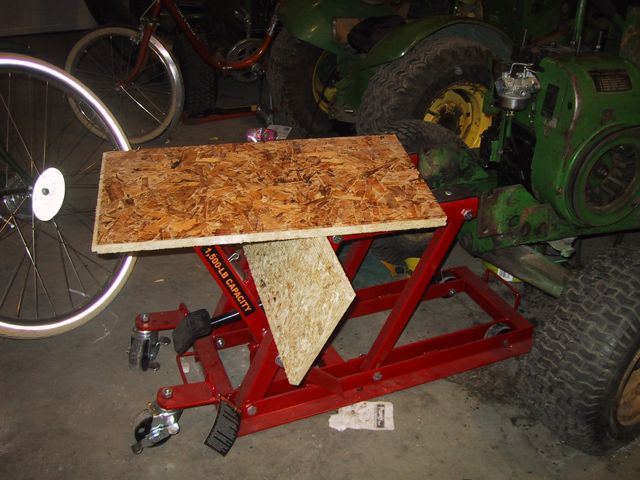
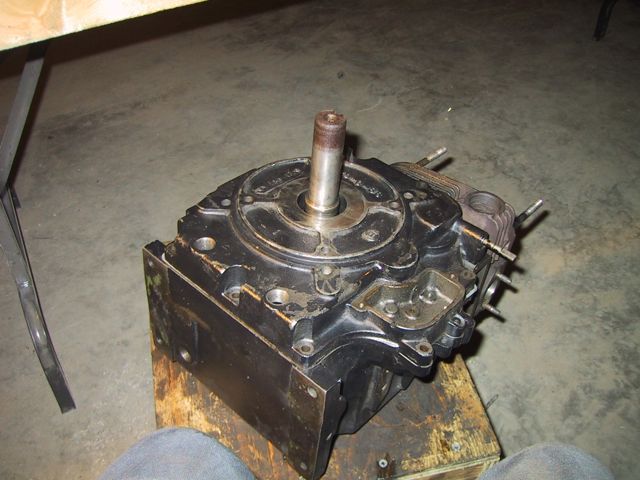
Anyone want to guess what they’re gonna turn out to be?

We now return you to your regularly scheduled tractor programming!

Since I wasn’t tired YET, I thought I’d pop the engine back into its home…

I KNEW there was a good reason I bought this! Since I couldn’t LIFT the bloody engine with the flywheel and generator on it, the motorcycle lift and a couple of boards for sliding the motor along worked SLICK…

And….. ALMOST home free! Just have to remember to bolt it in!

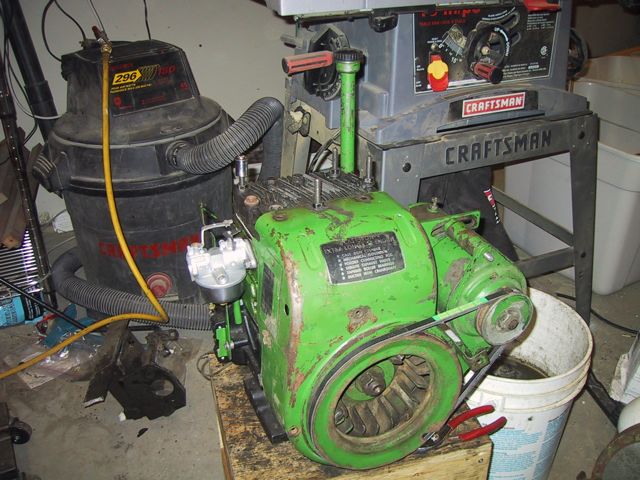
(well, and get the air cleaner on… and the gas tank hooked up… and the oil plug back in… Oh, and get some oil into it… and hook up the electrical… Other than that, and a complete cosmetic restore, I’m almost done!  )

Posted in Bror | Leave a comment

Some days, I JUST don’t understand….

Okay, so I just don’t really understand…. Off I went to a local major auto franchise place that shall remain nameless (to protect the innocent) to pick up some ant-seizing compound… Now granted, I’ve NEVER bought it before so I wasn’t too sure where it would be, or what it would look like… So, I go in and stop at the parts counter and say….

“I’m looking for some anti-seizing compound, like Never-Seize…”

“Oh,” says the kid behind the counter (they’re ALL kids, compared to me), “Like WD-40”.

“No, something to apply to, say, shafts, BEFORE you put, like, a flywheel on, so that it doesn’t seize onto the shaft”.

“Oh…… Um, well, I don’t know if we HAVE anything like that, but all our GREASES are over there, and all our LUBES are up over there.”

Oh. So I look through the grease section and don’t find anything. So I go over to the lubrication section and hunt around in THERE for 15 minutes, reading labels and checking cans and so on…. While I’m standing there looking flummoxed, a friend of mine I haven’t seen for 6 months happens by…

“Hey, whatcha up to?” he says…

So I tell him my sob story about not being able to find any Anti-Seize….

“Of course they have it! I just bought some the other week… Its right over here!”

And there, tucked into a teeny tiny corner of the back edge of the grease shelf is this:

So, I make sure to go back to the parts counter, where the kid is still standing, and I say (nicely)…

“Just so you know, THIS is anti-seize…”

“Ooooohhh, ANTI-SEIZE! For like, copper-plating your shafts! Right!”

Good thing I didn’t have my big brass-handled cane there….

Some days, I JUST don’t understand….

Okay, back to installing a flywheel!

Posted in Geeky Tractor-y Stuff, Tools, Tractor Repair Stuff | Leave a comment

Whoo HOO! Found the bolts!

Whoo hooo!! Found the flywheel shroud bolts! Okay, moving on… Out to get some sort of Never-Seize to coat the flywheel shaft with!
(the bolts were stuck in the bag with the governor bits!)
Posted in Bror, Uncategorized | Leave a comment

Thursday night’s work… and problems

Got the valve springs and keepers in… Wow there’s REALLY an art to that, isn’t there? Looking at the picture, I’d say perhaps I gotta check the exhaust valve keeper again

When I was going through my labeled bags, I noticed THIS piece…. DOH! Into the crankcase again! And they even SAID in the tech manual, ensure you put the spool back in!

There it is, back in its home…

Isn’t this a PRETTY head gasket?

So, then, an hour and a half of trying to remember what order the different lengths of head bolt went in…. Now I know what I should have been carefully noting dow when I took the head off.

Of course, I think PART of the problem is that I need to bolt some of those head bolts through the shrouding…. Which of course I don’t have ON yet, because I don’t have the flywheel on… Nor do I have the shrouding from behind the flywheel installed…. To do so, I need the three little bolts I took out of THERE…… which I CAN’T find! DOH! I KNOW I bagged and tagged them…. Here’s my oversight tho, I didn’t put all the bags in one spot… I KNEW I should have nicked that sewing organizer LTGal didn’t want any more. Well, I’ll tear through the garage a few more times and see what I find… Then I’ll take people’s advice and see about buying some at a hardware store or bolt place… Except that puts me back until Tuesday now..

Well, might as well put the new breather from the donor engine on..

Posted in Bror | Leave a comment

Got the engine back this afternoon

RIP, Steve Jobs…

And after a quick supper at the parental units’, back out into the garage to see what I can get done… BIT of a brief setback, tho. While I was out on Tuesday dropping off the engine and picking up plumbing for Kidlet #1’s halloween costume, I decided to pick up a new oil seal installer…

(actually, its a PVC tailpiece for a sink drain… But EXACTLY the right height and diameter for this engine, with a bonus bigger flat side for driving the seals in… but you probably already KNEW that!)

So, got the engine back out into the garage, figured I didn’t have the PTO-side oil seal down low enough, so I thought I’d try out the new seal tool… BONK with the mallet… DOH! The seal went down an eighth of an inch too far… and crooked! Off comes the crankcase cover again! Good thing, tho, ’cause I noticed a bolt I hadn’t torqued in… And I even managed to do it without wrecking the gasket… One question tho… I can see, just from the bit of time the bolts have been in the crankcase, they’ve developed a bit of surface rust…. So I dried them a bit, checked the bolt holes, and greased the bolts… Think that’ll be okay?

Oil seal went back in well with the new tool… Now for the main event… Some pics of the cleaned up valve seat and valve….

The seat….

The valve stem…

The valve face…
https://wp.thatneedstobeathing.com/wp…leanvalve2.jpg

(So, will I need to lap this valve in, now that its been reground?)

All set for valve springs…. I think….

So, any thought/suggestions before I put the springs and keepers back in? I gave the valves a bit of a clean with carb cleaner (since I don’t have any other solvent handy)…

Other thing I got done LAST night were these two….


Got the rims all finished painting up for the 160… Now some valvestems, oh, and tires…. Just rushing before winter REALLY gets here….

Posted in Bror | 1 Comment

Area of Concern on my intake valve

Okay, HERE is my area of concern on the intake valve seat… I’ve lapped 5 times now, this spot is still there…. Got a nice band all around the valve, but THIS won’t go away… And it feels rough to the touch… Have I got a bad or pitted valve seat? What do I do about it?

(It took me 15 shots to get THIS picture)

Also, while my exhaust valve has a good .010″ clearance (at least, when I put the .006 feeler and .004 feeler together, because my gauge doesn’t HAVE a .010 feeler, what’s up with THAT, I can slide the two into the gap between the tappet and the valve no problem), my intake valve seems kinda tight… If I put the two feelers in there, then hold the valve down slightly with my thumb, I have some trouble pulling the feeler out…. Will I need to grind? And what do I do if I don’t have a bench grinder?!?! (I KNEW I shoulda bought that Princess Auto $40 bench grinder when it was on sale in August!)

Edit:
Okay, the engine is in at a local machine shop,  Precision Engine…. They say “No problems, we can clean that up just fine, AND grind your valve stem”…. I feel better now….

Now to find a way to pull the steering wheel on Bror so I can do some repairs on it and change out the dash (since I won’t have an engine back until later this week)….

Edit Edit:  and yes, I bought the bench grinder!  But it was only the $25 one
Posted in Bror | Leave a comment

Aaaaaannnd…. I probably shouldn’t go shopping unsupervised….


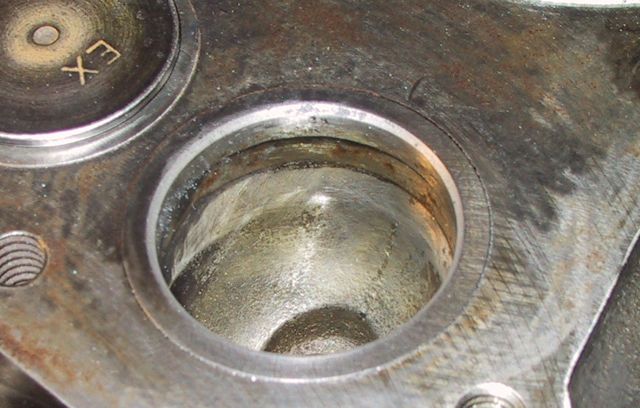
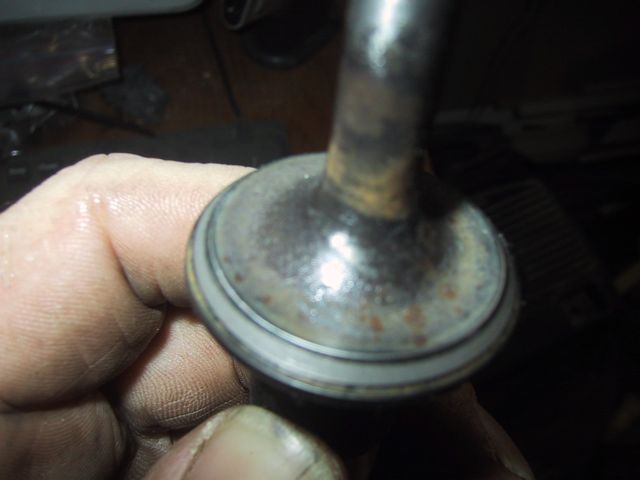
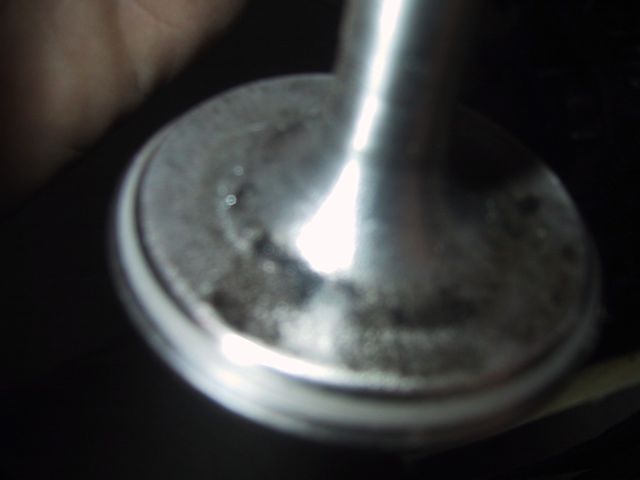
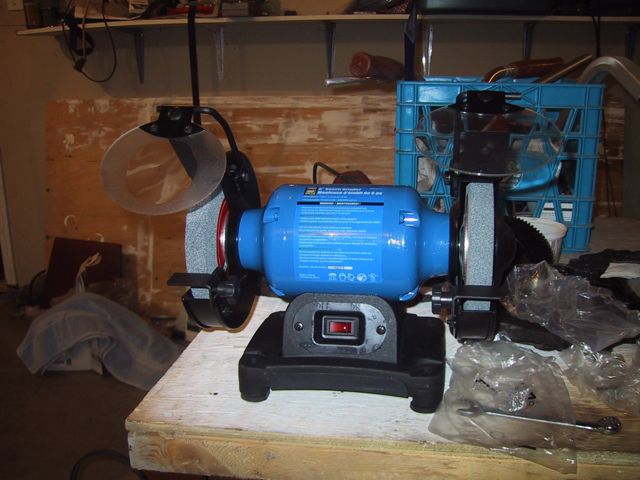
I know, I don’t have any reason for it, now that the valve stem is being ground at the engine shop…. Well, except for helping kidlet #1 make her halloween costume (you don’t want to know… at least until I have pictures)… AND it was on sale…. and I’ve always wanted one!

K…Focus! Back to tractors now!

Posted in Tools | Leave a comment

What I got done this weekend!

Well, totally crazy weekend, running kids around here and there, but wound up going out to Greensail’s place to pull some bits off a donor RF 110 (no pics of those yet, but thanks for letting me come out and mess with it, Greensail!)… One interesting thing I learned from doing that is my grandfather had been taking parts off OTHER “brands” of engine to fix up his 112…. Greensail’s donor 110 had a repower done on it at one point. Looks like the PO replaced the 8 horse Kohler with a Tec HH100 on it, the model WITHOUT points, but with a starter motor instead of a starter/generator… Not sure what model of tractor IT came off of, its painted orange, but interestingly enough, the crankcase breather on IT is identical to the one that I took off of Bror… Which is DIFFERENT than the breather I took off of Frank, my recent donor engine… Hmmm, the plot thickens! 

Also got a bit of time to do some valve lapping yesterday….

Here’s my kit..

Marking with the Sharpie

Dropping the exhaust valve in…

Final result on the exhaust valve…. Personally, I think that looks good!

The intake valve – it still has hints-o-sharpie ink on it, although I couldn’t get my macro lens to show them… So, not sure if its done yet or not…

I’m a BIT worried about THIS spot on the intake valve seat. Again, its too blurry to give you all a good look, but this is a darker patch on the valve seat, that doesn’t look like its “ground out”. Does this mean more lapping? Or do I have a seat problem?

Posted in Uncategorized | Leave a comment

Last Night’s Work….

So, as promised, some more pictures about what I got done last night….First thing I did was go after Donor Frank to pull some bits out…. On the downside, after I pulled the cylinder cover off to get at the governor rod, I found that no, Frank does NOT have the same camshaft… No EZEE-Crank Automatic Compression Release on it! 

BUT…. a perfect governor rod! And I even found the section in the tech manual that said if the governor rod was at all loose to replace it! So I DID!

Here it is, installed in the cover…

Lotsa spots talking about needing to be oiled before being put together, so I nabbed my oil can…

Tappets going back into their respective holes (see how nice my sharpie marker stayed visible on them?!?).

Got my timing marks aligned! (This looks right, doesn’t it? Line on camshaft aligned with chamfered tooth…)

Pulled the crankcase gasket out of my full gasket set that I bought so many months ago…

Here it is laid out on the crankcase…


Hope this little crinkle won’t be a problem…

And setting the cover on…. So when I went to check the torque chart in the tech manual for the HH100, it listed the smallest bolts as 7/16 head, at 10 ft/lbs of torque… But the crankcase bolts are even smaller, at 3/8 head… Should I be torquing those to 10 ft/lbs? On one hand, that doesn’t seem to be a whole lot, on the other hand, I wanna be able to get them out sometime, right? And I don’t want to crush the gasket right out… THAT’S why the numbers are so low, right?

Okay, plugs are back in (still need to tighten them), I THOUGHT I was gonna be done at this point….except for oil seals of course

But then I read the bit in the tech manual about crankshaft end play… Stick the feeler gauge under the bearing retainer, between it and the case, to determine whether you need to use the shim gaskets to increase the crankshaft end play to an acceptable amount (.0003, it sounds like)… Well, I tried to put the feeler gauge under there, no go! Uh oh….

So here’s the gaskets they shipped (I had been wondering what these were for!)

Here they are placed on the bearing retainer. I decided since, obviously my existing bearing retainer gasket (a rubber ring around the base of the bearing retainer) must be totally smushed, allowing what seemed like no play, I’d go for broke and use all three..

Then, onto the oil seals… Hey, guess what I found when I looked in my gasket kit! DOH! Oh well, lotsa spares…. Maybe they’ll fit the kohler on Ernie…

Flywheel side went in really nice with my piece of tubing and the rubber mallet.

PTO side was a bit more of a challenge, as I didn’t have a long enough piece of tubing. So, careful tapping around the outside of the tubing to set the seal in the hole, then putting it in the rest of the way with my “drift” (aka socket extension, since my drift has (ha ha) “gone adrift”!).

So, stay tuned for the next episode, where I start looking at valve gapping, lapping and installing!

Posted in Bror, Uncategorized | Leave a comment

The drift question, answered….

Originally Posted by biker3777 View Post
set the punch on the end of the rod bolt and tap it.I just use a plastic hammer to tap the rod cap on the side just make sure it is not bound up.
Quote:
Originally Posted by marlboro180 View Post

Looking great LTG.
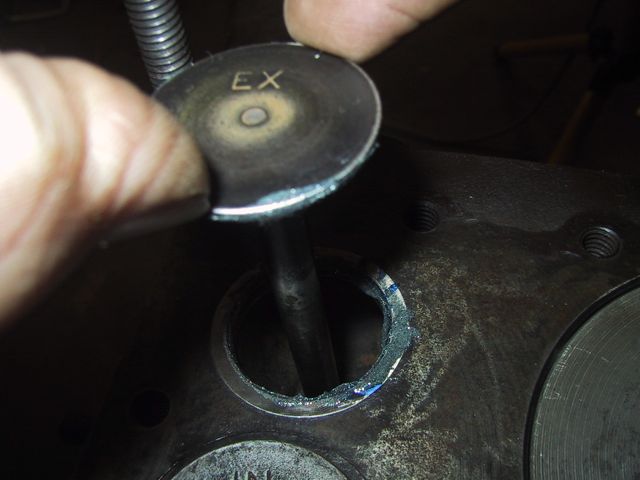
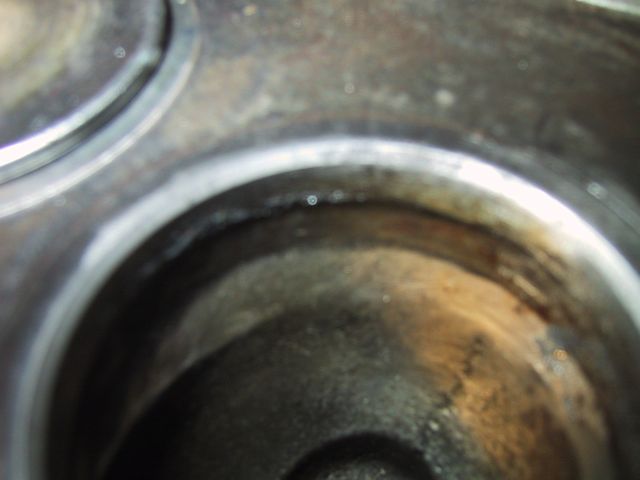
After squirting some assembly lube up into the bore from the crank side, rotate that crank so you can get to the rod cap readily.
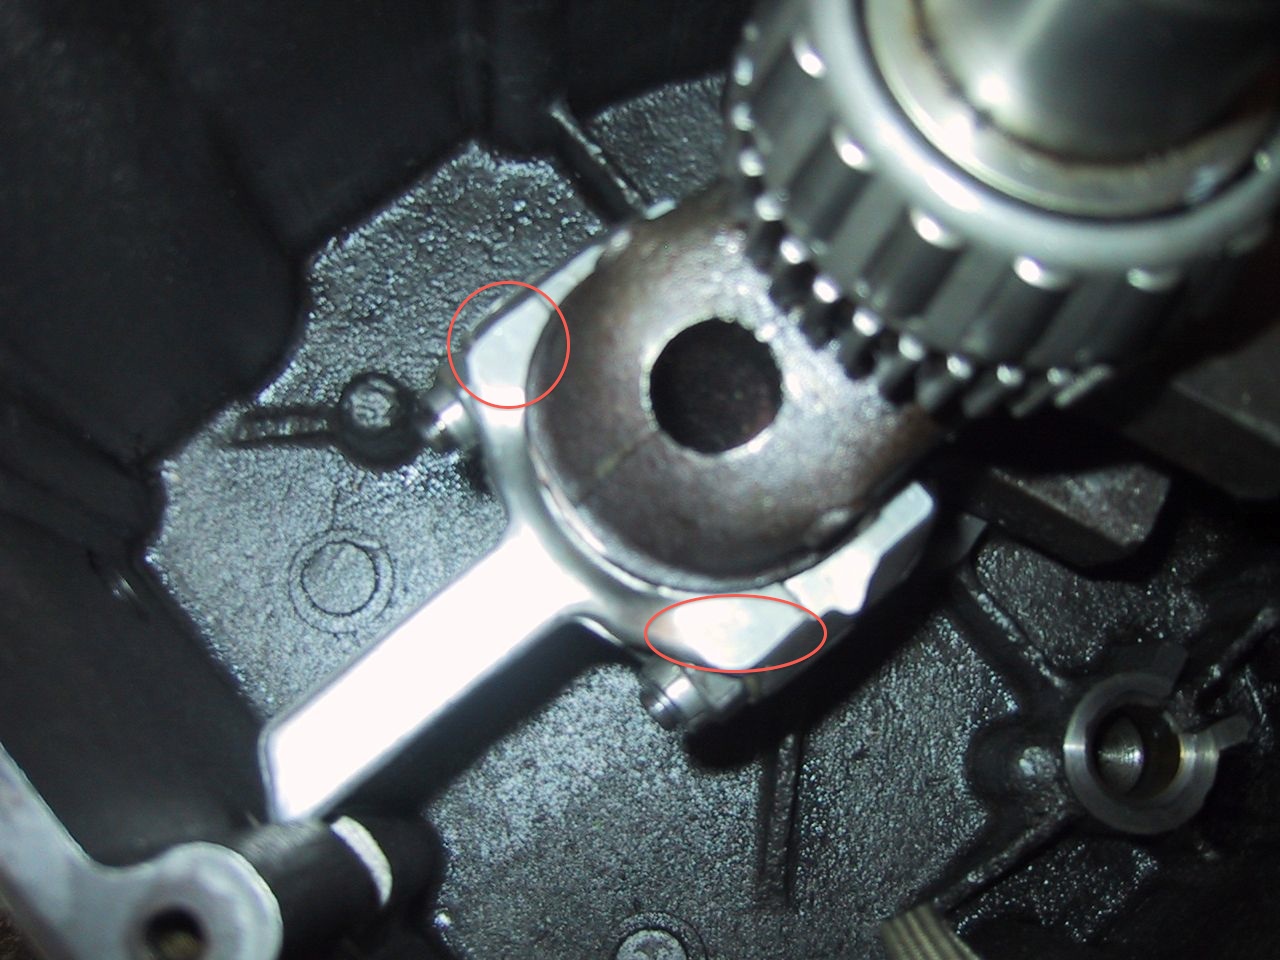
Take that drift , and place it above the rod cap bolt nuts, up on on the cap a bit but near the nuts . Give it a couple loving smacks with a hammer. … This will help in true alignment of the cap ( and thus the bearing surface ), relieves stress from assembly should it be cocked in any way due to oil / crud/ ugly bits in between the mating surfaces. I’d bet that the way those rod bolts are assembled at the plant they are only so ” true” to one another, and smacking the cap would help that too.

Then go about re- torquing the rod cap nuts per the manual. 

Okay, so I TAP it HERE!

And assembly lube can be any medium-weight oil, right?

So the OTHER good news last night was, the governor arm that I felt was a bit loose, I can get another out of Donor Frank…. I ALSO took some time last night to pull the valves, valve springs and keepers out of Frank. The springs at least look a lot better than the ones currently for Bror… The valves weren’t as crusty, and the intake cleaned up really nice, but I might as well stay with the valves I’ve got. Except for the head, which is crusty from an electrical fire, Frank seems to be in pretty good shape…

Oh, and I ordered the light for the sandblasting cabinet the other night…

Posted in Uncategorized | Leave a comment